|
|
Zagi EPP Combat Wing
Building and Construction Tips for the Zagi EPP Combat Wing
The Zagi EPP Combat Wing is a great heavy lift slope combat wing. Its made entirely of EPP foam (i.e. nearly indestructible) with 5 coroplast spars. Trick refers to this as an active spar matrix, but it really just means heavy, flat plastic glued into the top and bottom of the wing. If your looking for a lighter slope wing, this is'nt for you. Check out the Boomerang page, or Trick's Zagi THL (not entirely EPP so less indestructible).
|
 A view from the nose of the Zagi. Its important to maintain as much of the airfoil profile as possible when installing radio gear.
|
|
General Building Tips
1. READ THE INSTRUCTIONS THREE TIMES! This is very important. If your new to this type of construction, you need to read through the instructions before you start building. Reading all the way through them will prepare you for the next step in the process. Trust me, I should have learned this by now!
2. ALWAYS BUILD IN THE WING BEDS! This helps prevent any warping of the wings during joining of the halves, covering, or installing the spar system. Don't EVER throw them away. You will have to do some repairs/recovering eventually and you will need them for the same purpose.
3. The coroplast spars that came with my Zagi EPP kit were too wide to fit into the channels cut into the wing panels. The instructions said to sand them to fit. Sanding coroplast is a nearly impossible task. So, either break out your dremmel rotary tool, or your exacto knife and a straight edge. Trim them slightly, test to fit, then trim slightly again. You want the snuggest fit possible, without leaving gaps between the spars and the foam. Mine have some gaps and I learned my lesson. It weakens the airframe quite a bit.
4. Try to install all the radio gear forward of their marked locations to prevent the need for balancing lead later. The Zagi EPP has the holes pre-cut, but to move things forward, just remove the "plugs", spray them with 3M, and push them back in. Then you can cut your own holes and maintain a solid airframe. Some people tape all the gear, elevons, control rods, and tiplets on before installing gear to determine where to install for balancing. I just like to move the gear forward and guess. Its turned out well so far.
5. Use standard Radio Gear. I used standard sized Futaba servos. Trust me, you will need the extra weight to balance this tank out!
6. Try really hard to install the gear so as to maintain the upper airfoil shape as much as possible. Any lumps or divots will reduce the airfoil efficiency and slow you down. Mount servos flush to the top, and create EPP foam covers top and bottom for the receiver and battery bays. Also, it might be a good idea to wrap the receiver in soft foam to protect it from combat or "landing" damage.
7. USE CONTRASTING COLORED TAPE TOP AND BOTTOM! You wouldnt believe how hard these things are to see when their in the air. I will generally cover the top a different color from the bottom, and put a white press on stripe on the bottom right side of the wing. I also put some contrasting strips of tape on the top right side so I can see it in rolls, etc. Orientation is key in these wings, so know which side is up!
|
|
Covering the Zagi EPP
In order to cover the Wing, you must spray it with 3M 77 adhesive. This stuff is expensive and sticky! Dont't do what I did the first time and spray the top and bottom wing while laying them in their beds. They really stick to the wax paper and its just a mess. Instead, find a ventilated area, hold the wing perpendicular to the ground (thats up and down) and spray one side. Then spray the other side, and lean it against a wall to dry for about 30 minutes. Make sure its tacky and not wet, then you are ready to put the strapping tape on.
Applying Strapping Tape
First, make sure the adhesive is tacky and not wet. Second, DON'T STRETCH THE TAPE, JUST LAY IT DOWN AND SMOOTH IT ON! Stretching the tape while applying it will warp your wing and you wil be screwed!
Use 1 inch wide tape for all applications to help reduce weight. Make sure to follow the tape instructions (they are pretty good), and apply extra tape around the nose and anywhere ahead of the CG. You will more than likely have to add weight, so it may as well be useful weight.
Applying the Covering Tape
After you apply the strapping tape (you did'nt stretch it did you?)you are ready to apply the covering tape. Now, make sure you have at least two rolls of covering tape (preferably Uline packing tape). You have to spray the wing again as above, and let it set up to a tacky composition.
DON'T STRETCH THE TAPE! Just pull off a length from the roll, cut it, then lay it down and smooth it on. Follow the instructions, they are pretty good. Get fancy with the covering, its fun to see the wilder covered wings zipping around. Also, its okay to have tape overlapp the edges while your covering, then you can take a razor blade to trim it off neatly.
Covering the Elevons
I don't care what the instructions say, cover the elevons in packing tape (contrast the colors here) and attach them to the wing with standard glider hinge tape. It comes on a roll from the hobby stores, and is exceptionally tough. I have never had it come loose. The packing tape on the elevons may be a bit heavier, but it sure does increase their strength. If they do break, you just pull the hinge tape off, repair, and put a new line of hinge tape on. Simple!
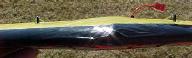
Attaching the Tiplets
Mount the tiplets flush with the bottom of the wing. It helps keep them from getting damaged. I apply a piece as pictured to the right, through the hole, and another in the front to keep the tiplet from fluttering.
Flying the Zagi EPP
First, make sure all your control surfaces move properly, and in the proper direction. Second, make sure the reflex of the elevons is per the instructions. They should be level with the bottom trailing edge surface of the wing. Third, make sure you have the CG balanced out properly as per the instructions. Finally, take it to the slope, turn it and the radio on, and throw it off! It should fly without much adjustment right out of the box. Have fun!
|
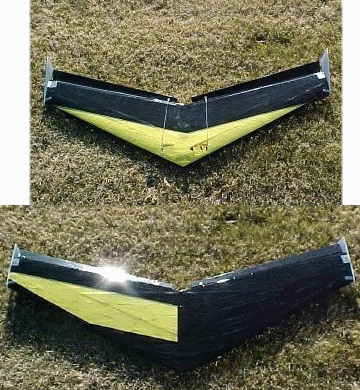 Here is a top view of the Zagi EPP covered in contrasting colors
This view shows the second incarnation of the Zagi EPP from its previously red covering to the current scheme. I didn't contrast enough before so I re-did the covering and filled in some holes with soft foam.
Here is a top view of the Zagi EPP covered in contrasting colors
This view shows the second incarnation of the Zagi EPP from its previously red covering to the current scheme. I didn't contrast enough before so I re-did the covering and filled in some holes with soft foam.
|
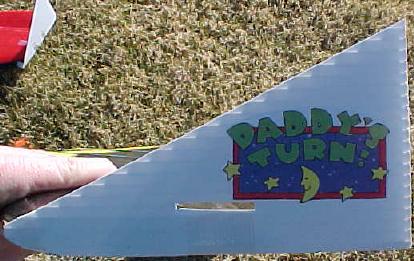
My Zagi EPP's nickname - "Daddy's Turn!"
|
|